For people who like to match their style, using a smartwatch is an excellent choice. There are lots of watch faces with different styles and colors that people can use. One day, I was exploring different watch faces for my Samsung Galaxy Watch but I didn't find what I needed. That was the point that I got an idea and Googled how to implement a watch face on my own. And yes! There actually is an app for that: WatchFaceStudio (WFS).
I read the documentation and I think it wasn't that hard! In this post, I'm going to implement a minimal watch face.
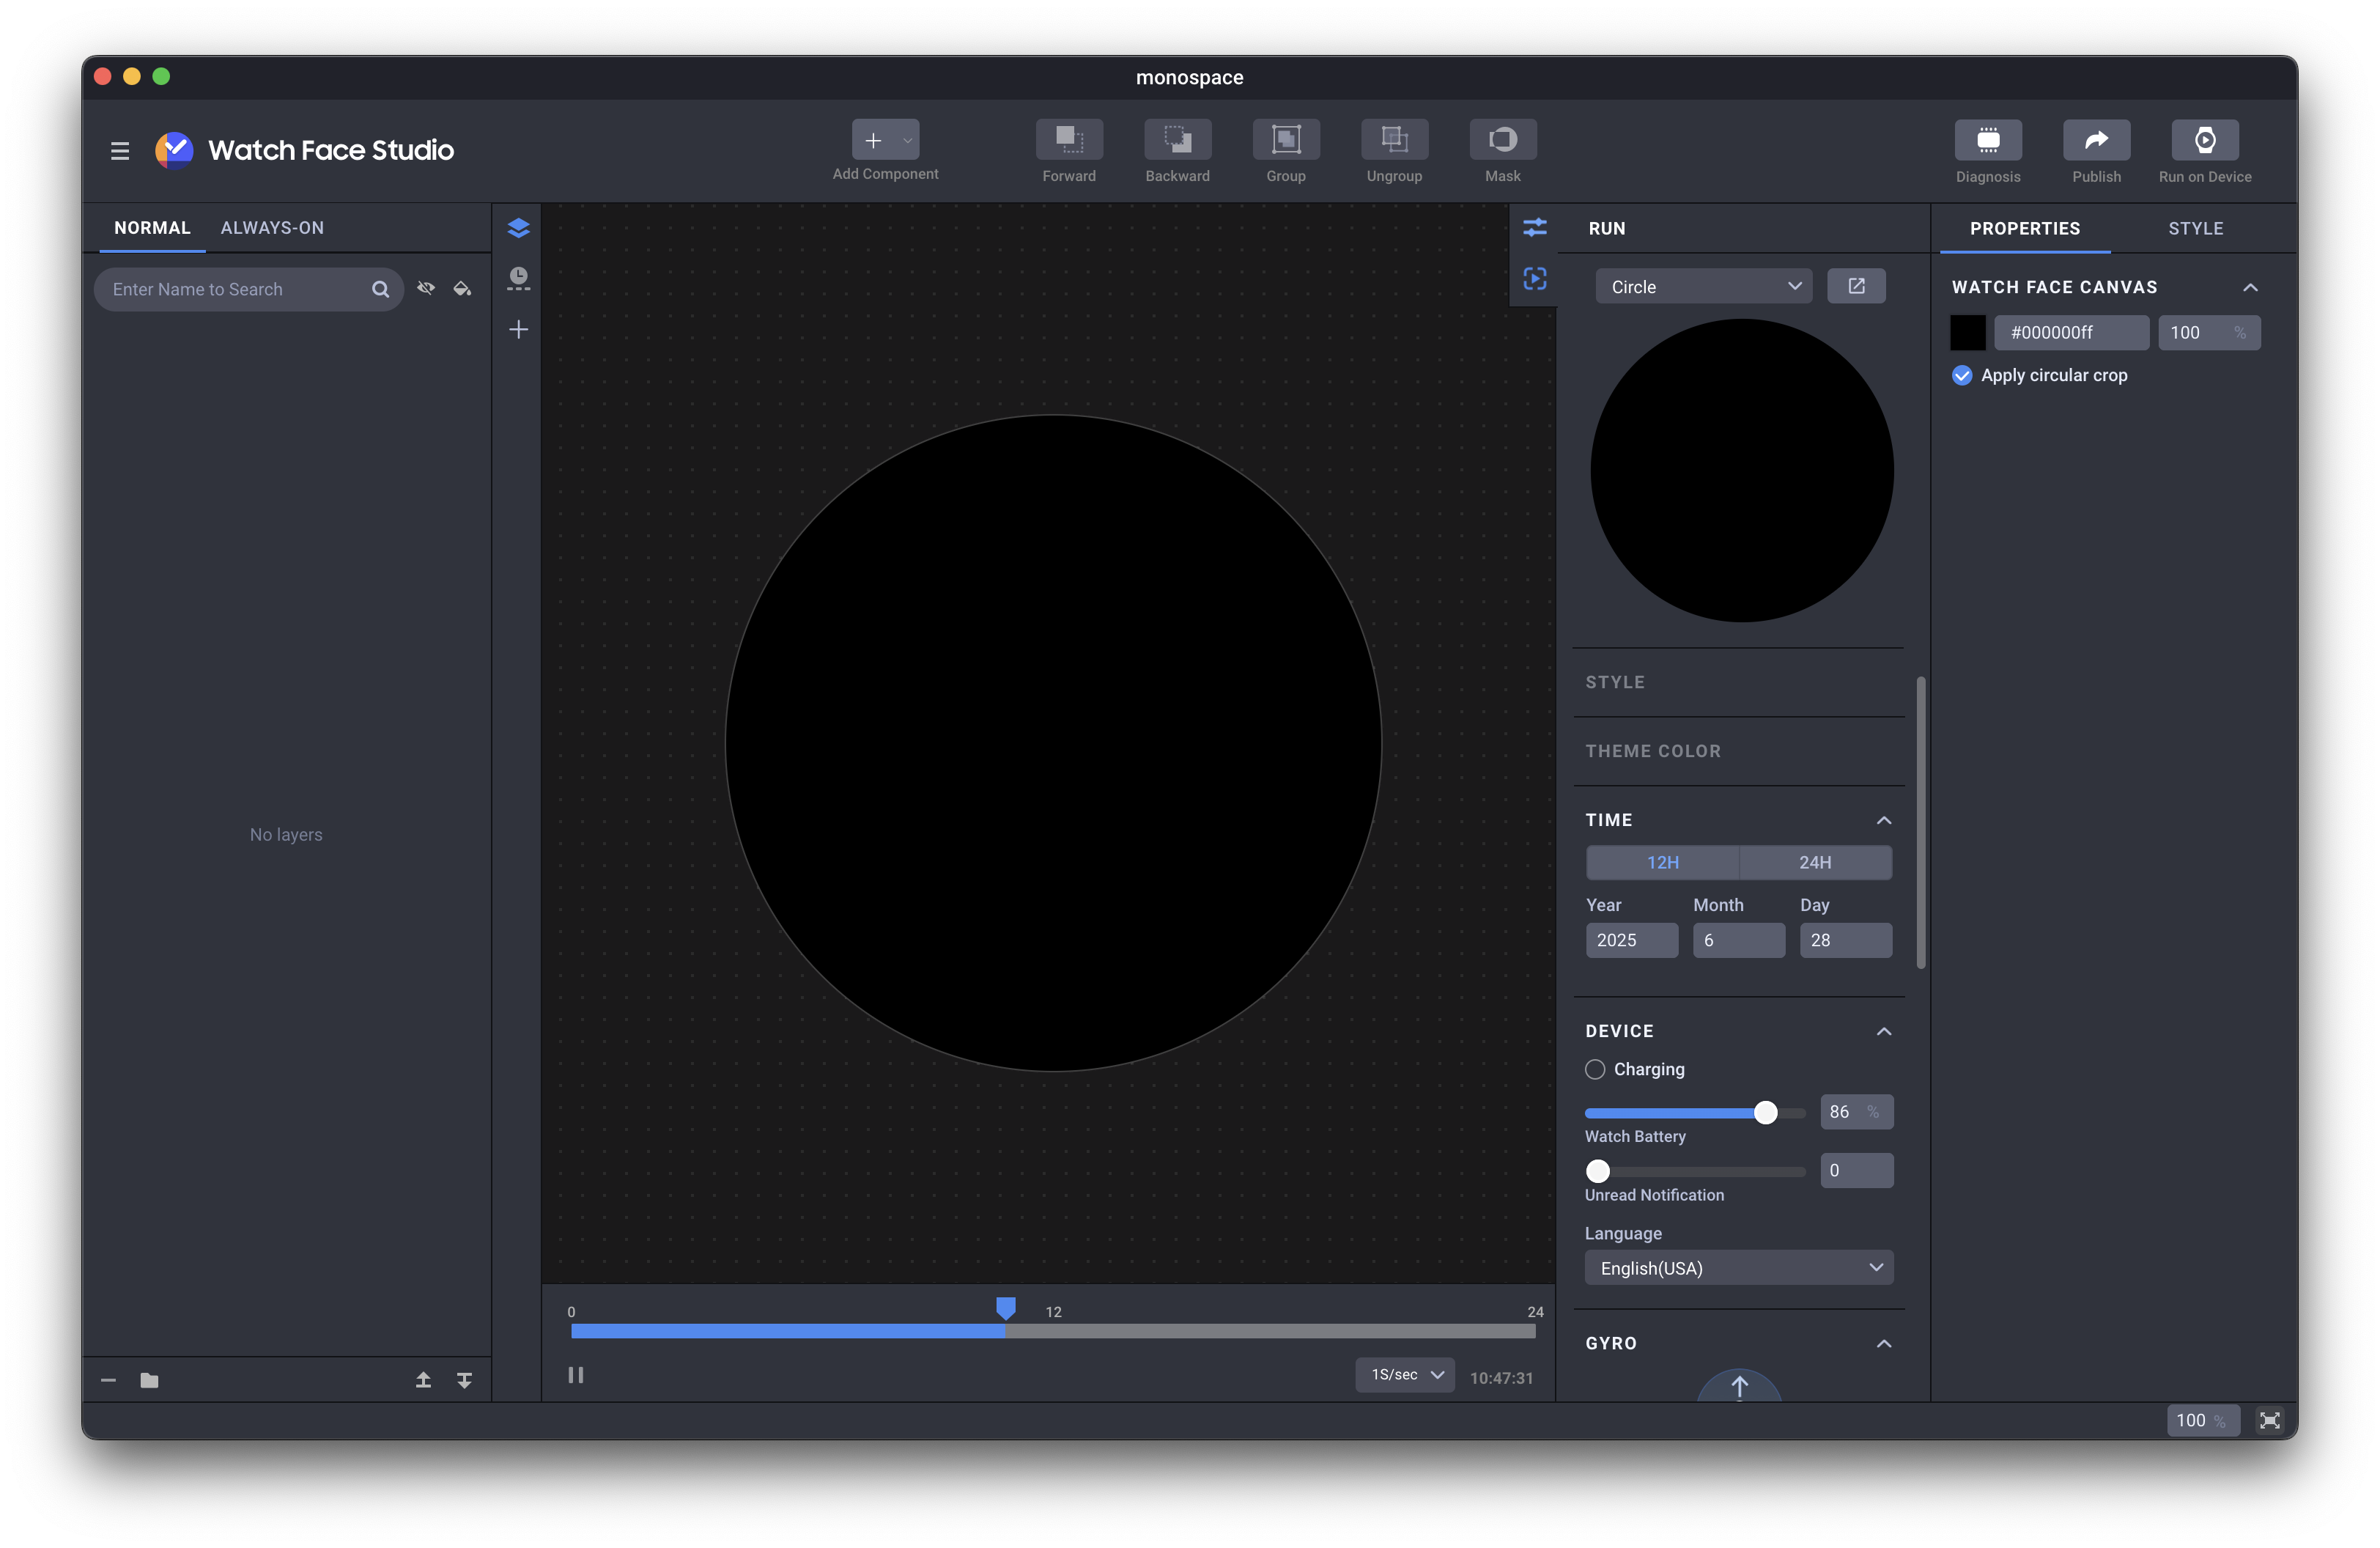
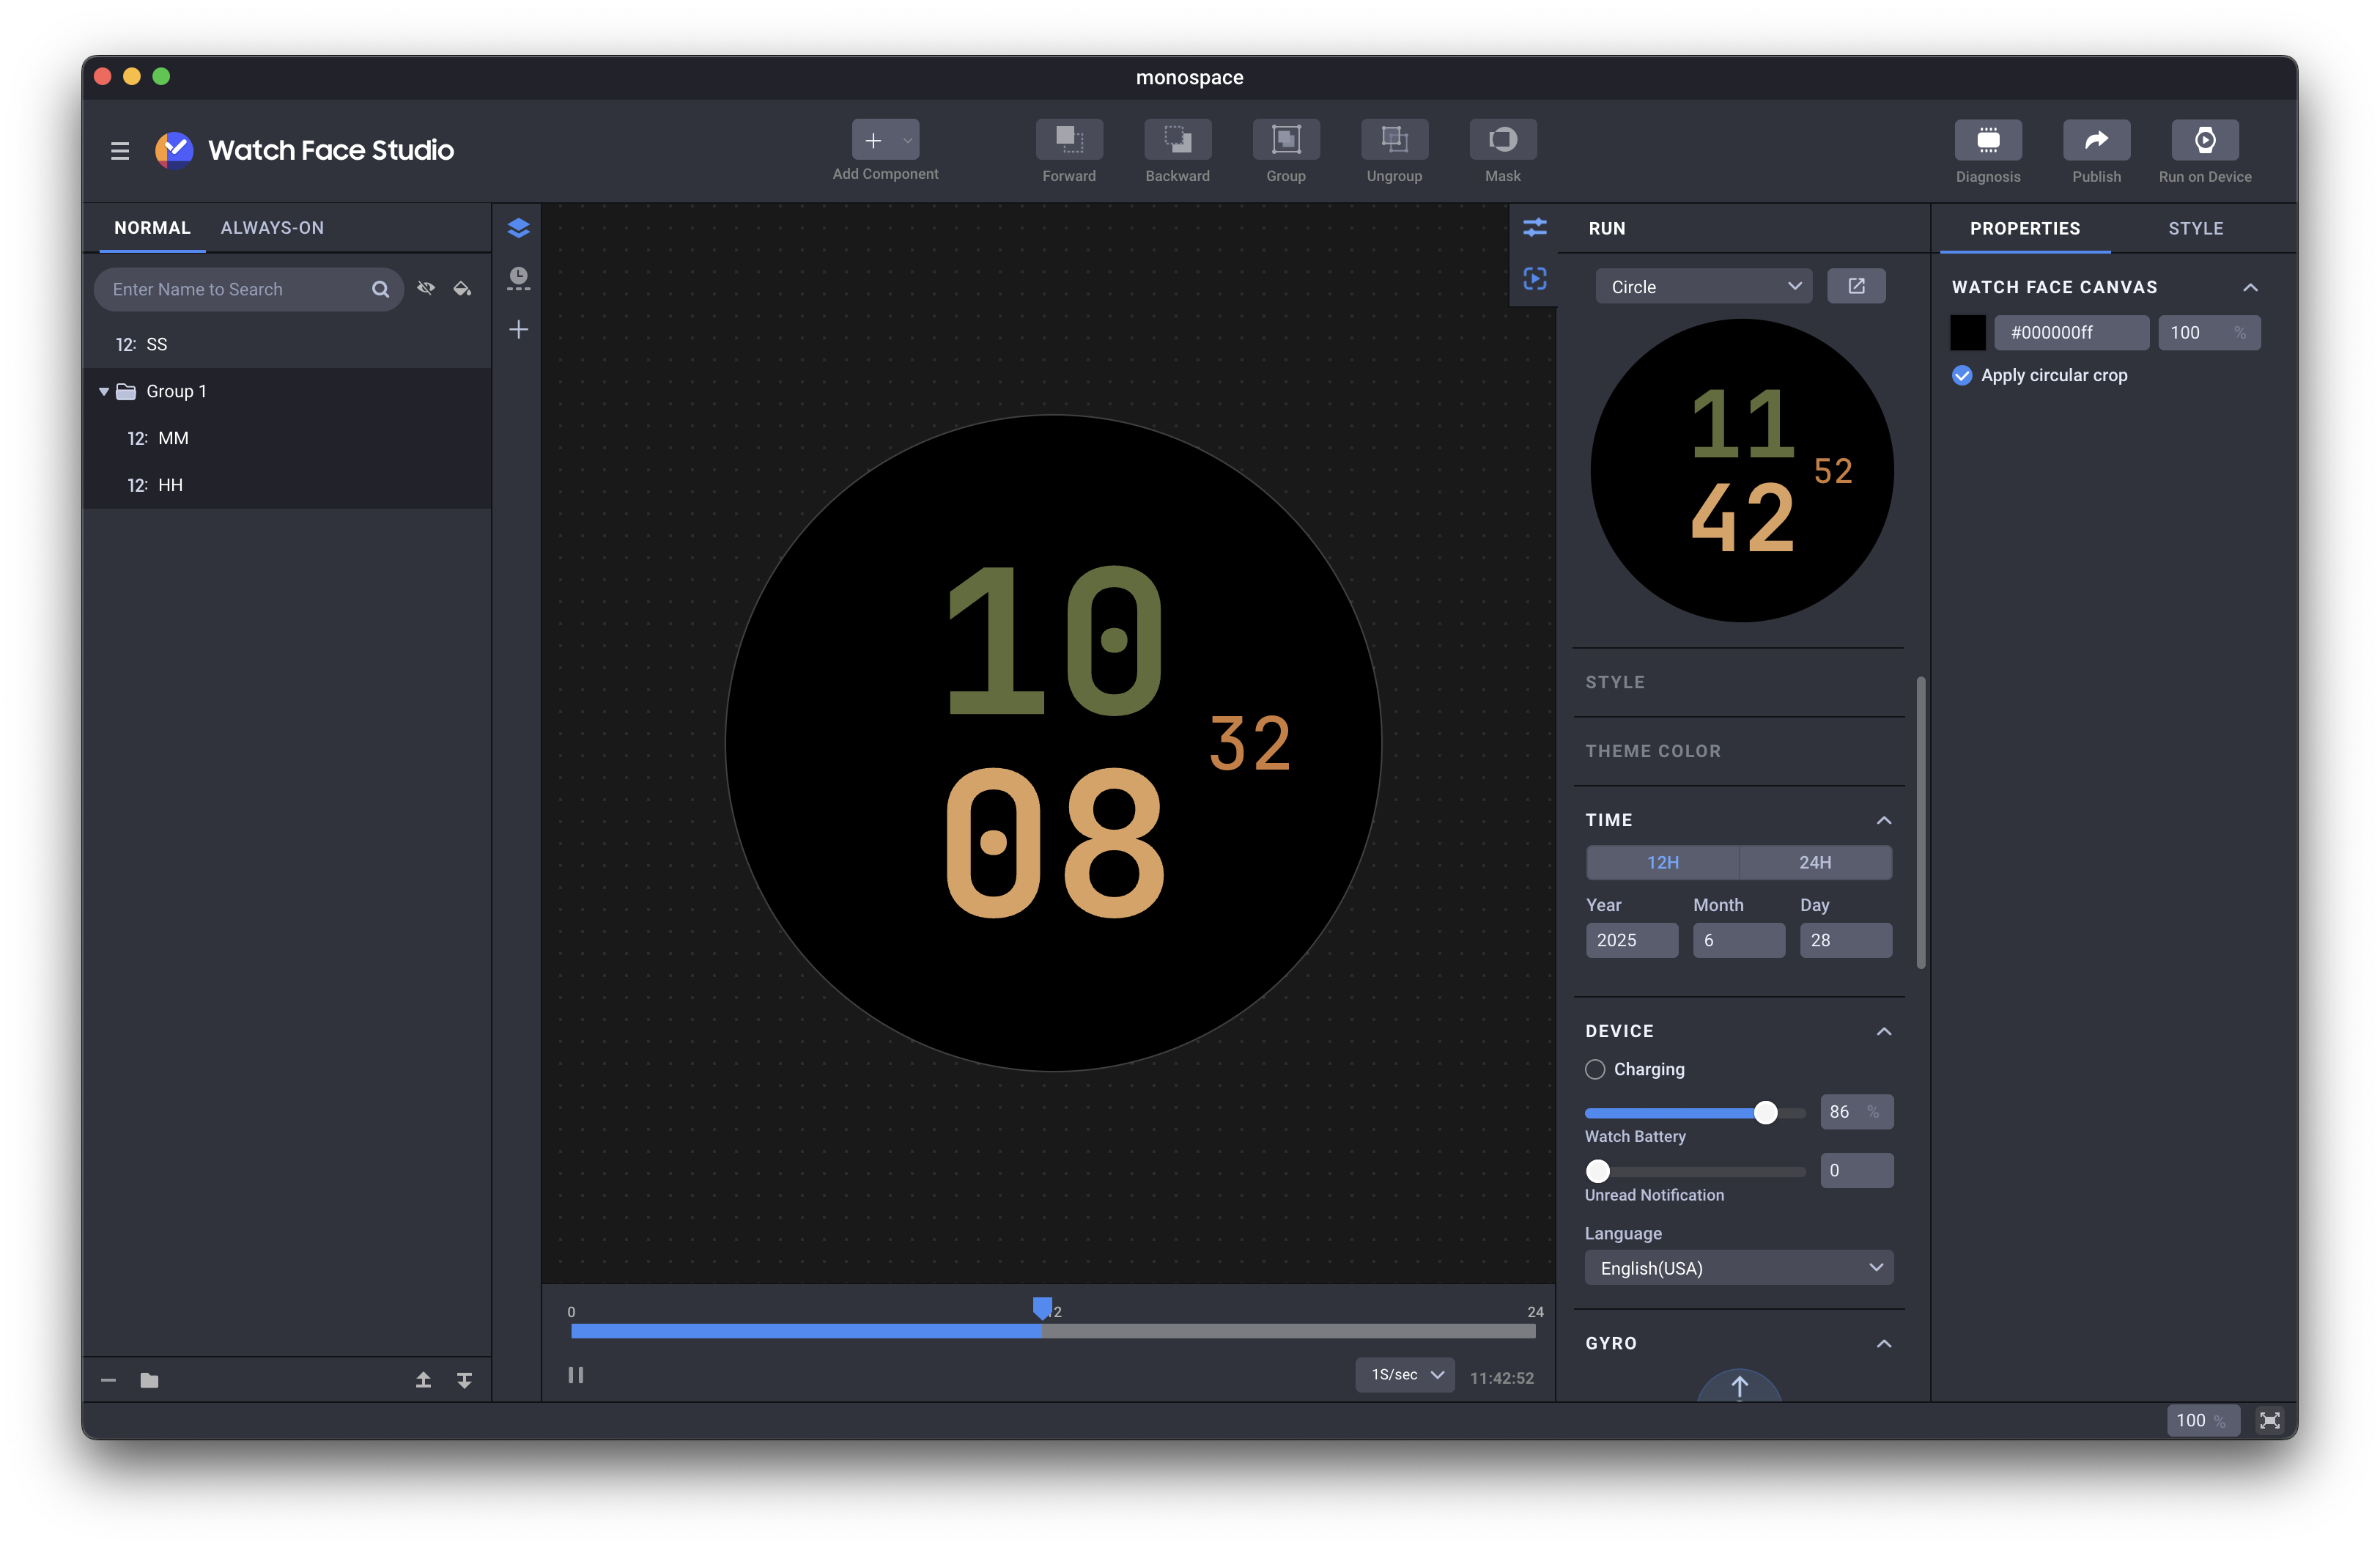
After downloading WFS, you can use the app and create a new project. After creating one, you will see this page:
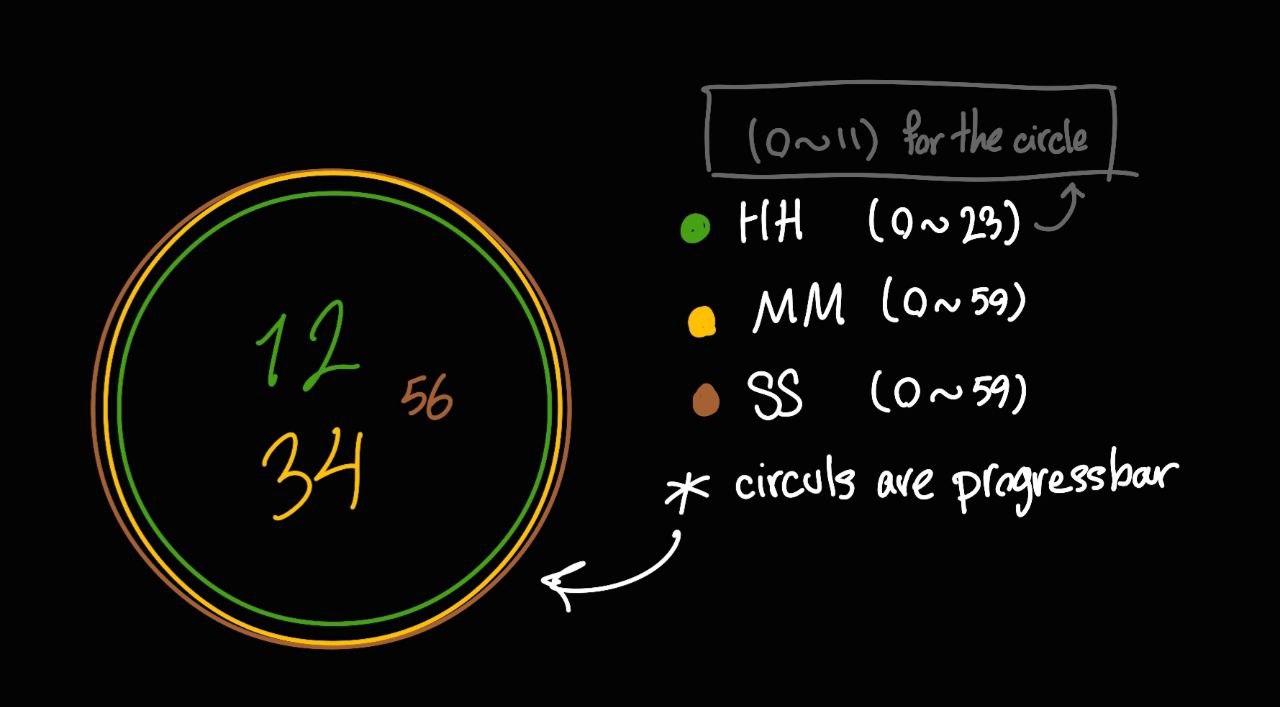
My design is going to be very simple. The watch face will be digital. The hour and minute numbers are going to be shown vertically, and the seconds number will be placed next to them. Also, for each value, there will be a ring around the clock that represents that number. This will also make the watch a little closer to analog ones!
Here's a minimal sketch for the design:
First, I'm going to implement the digits, then I'll add the rings around the watch.
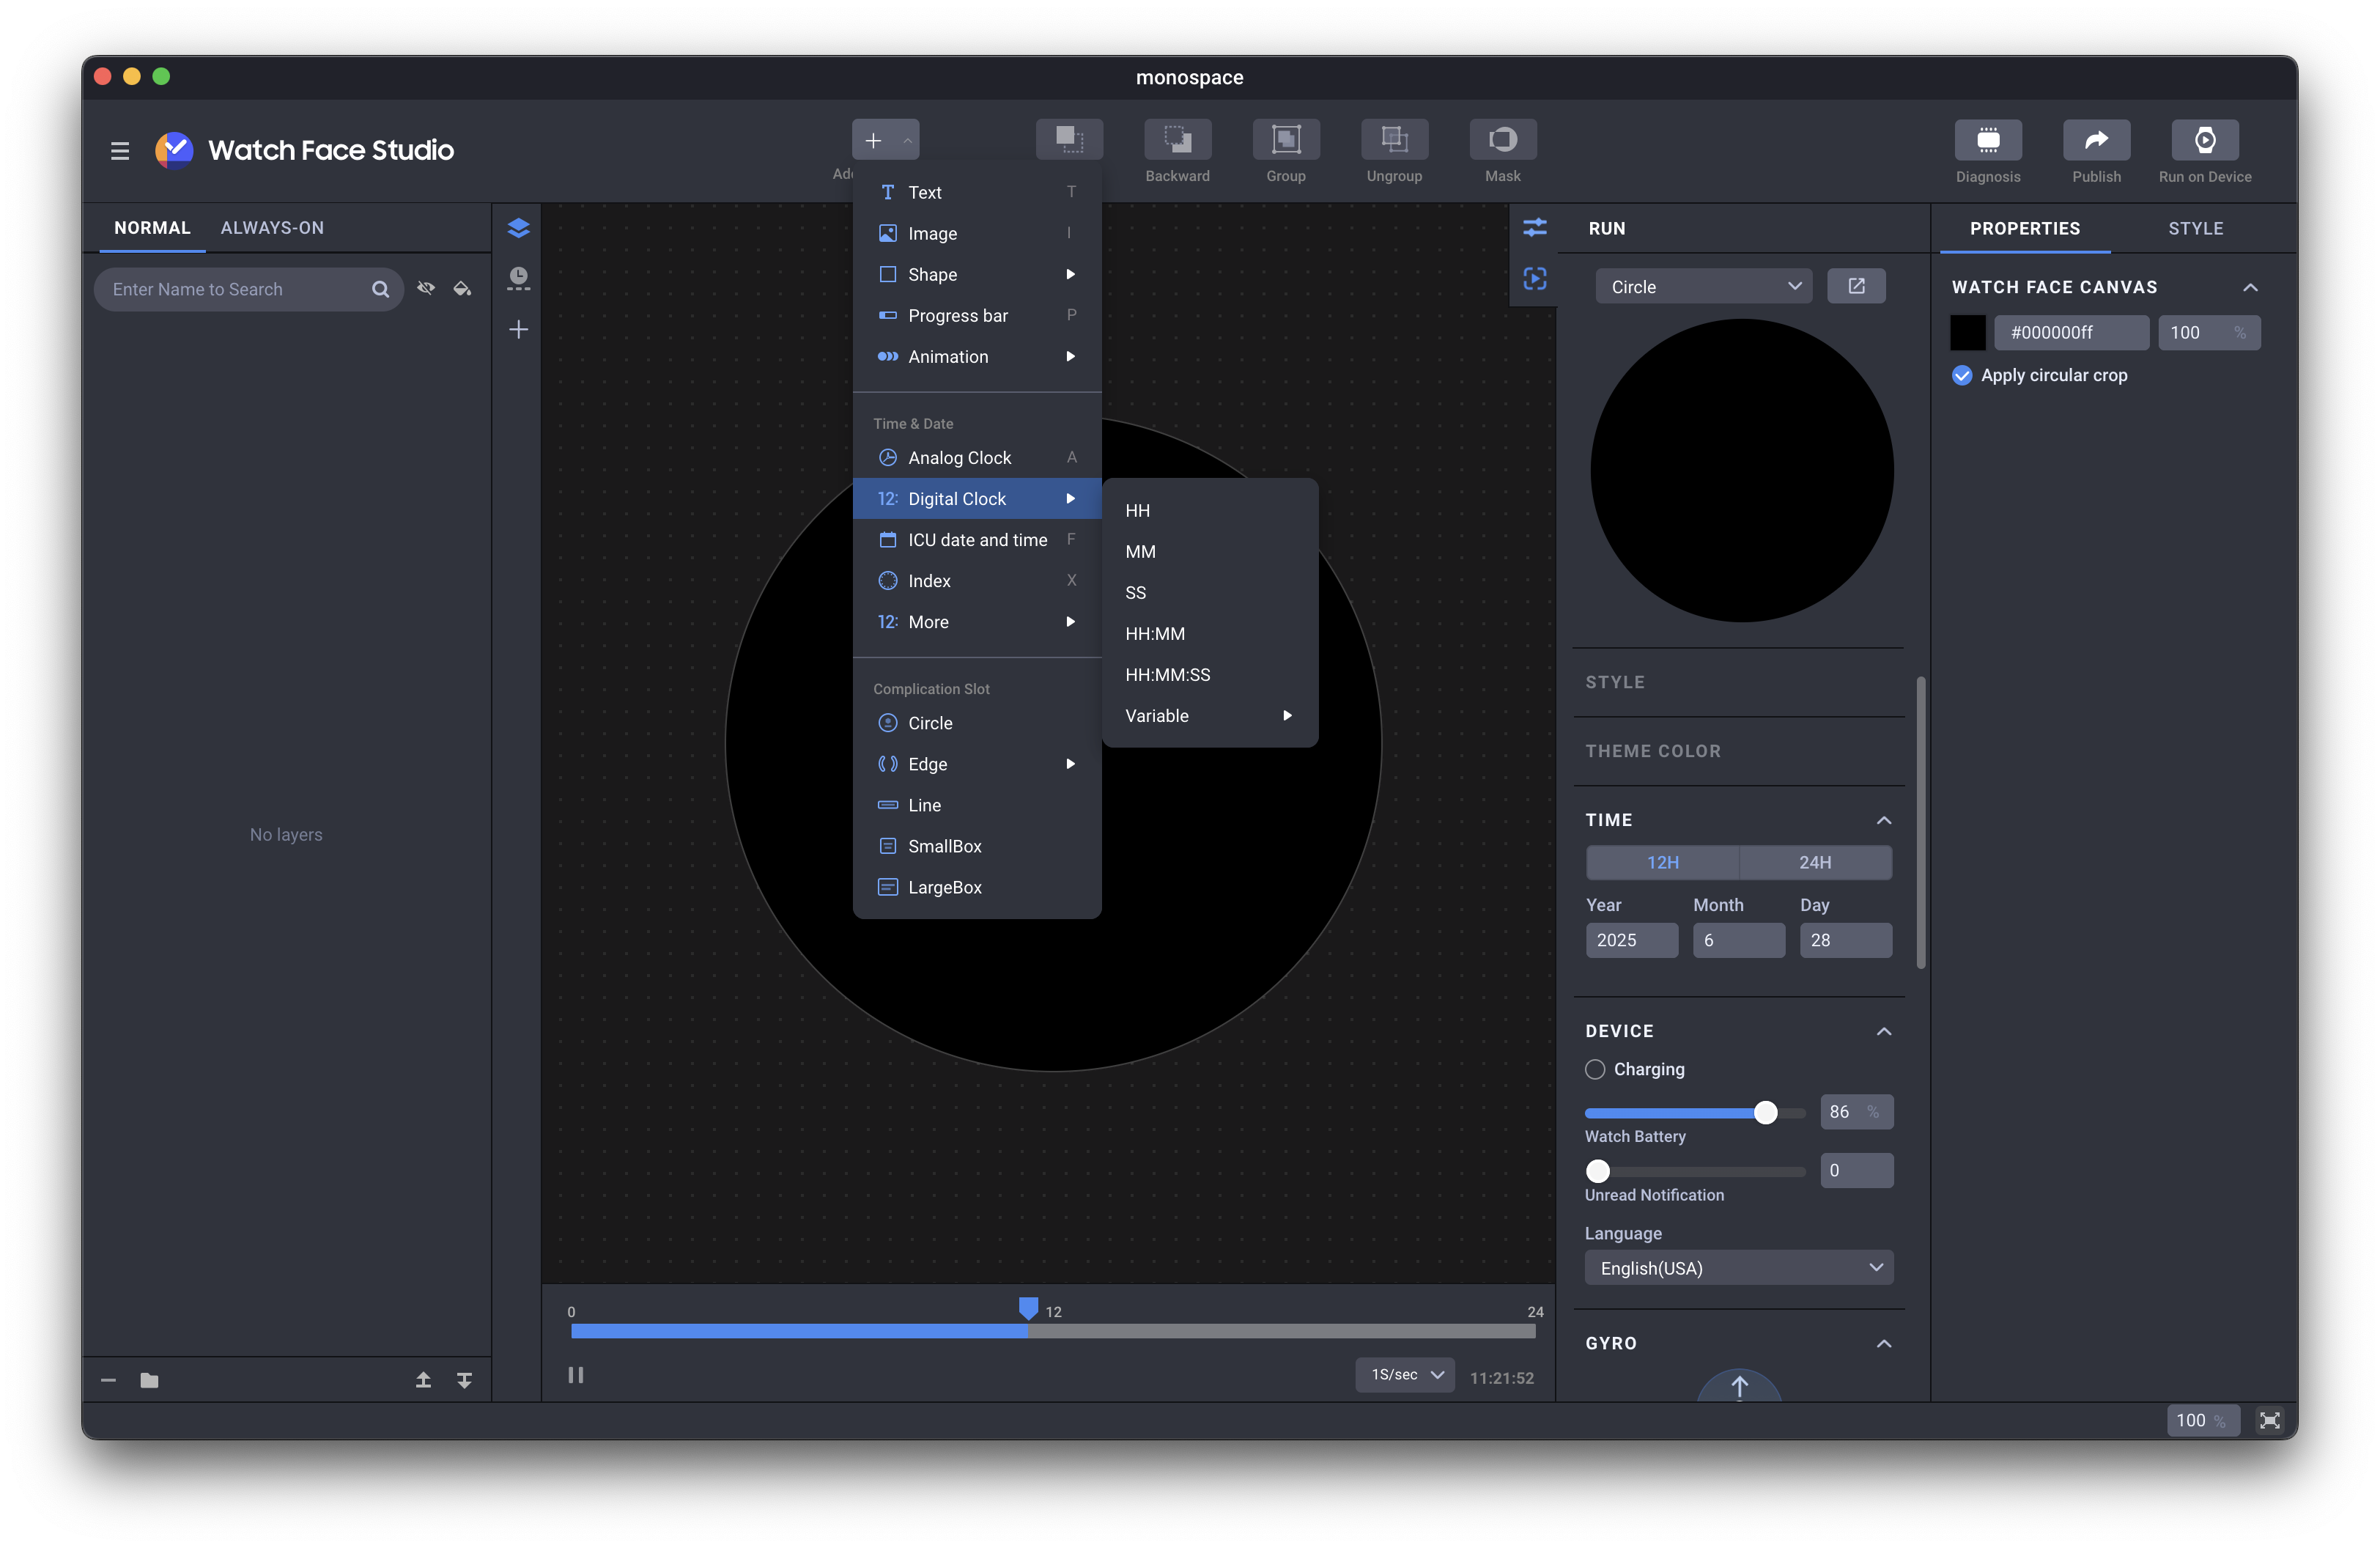
For adding elements to the clock, there's a button at the top of the app called "Add Component." Since I don't want a single section for my clock numbers, I need to import Hours, Minutes, and Seconds separately.
- Hours: Add Component → Digital Clock → HH
- Minutes: Add Component → Digital Clock → MM
- Seconds: Add Component → Digital Clock → SS
After selecting these components, they will be added to the clock.
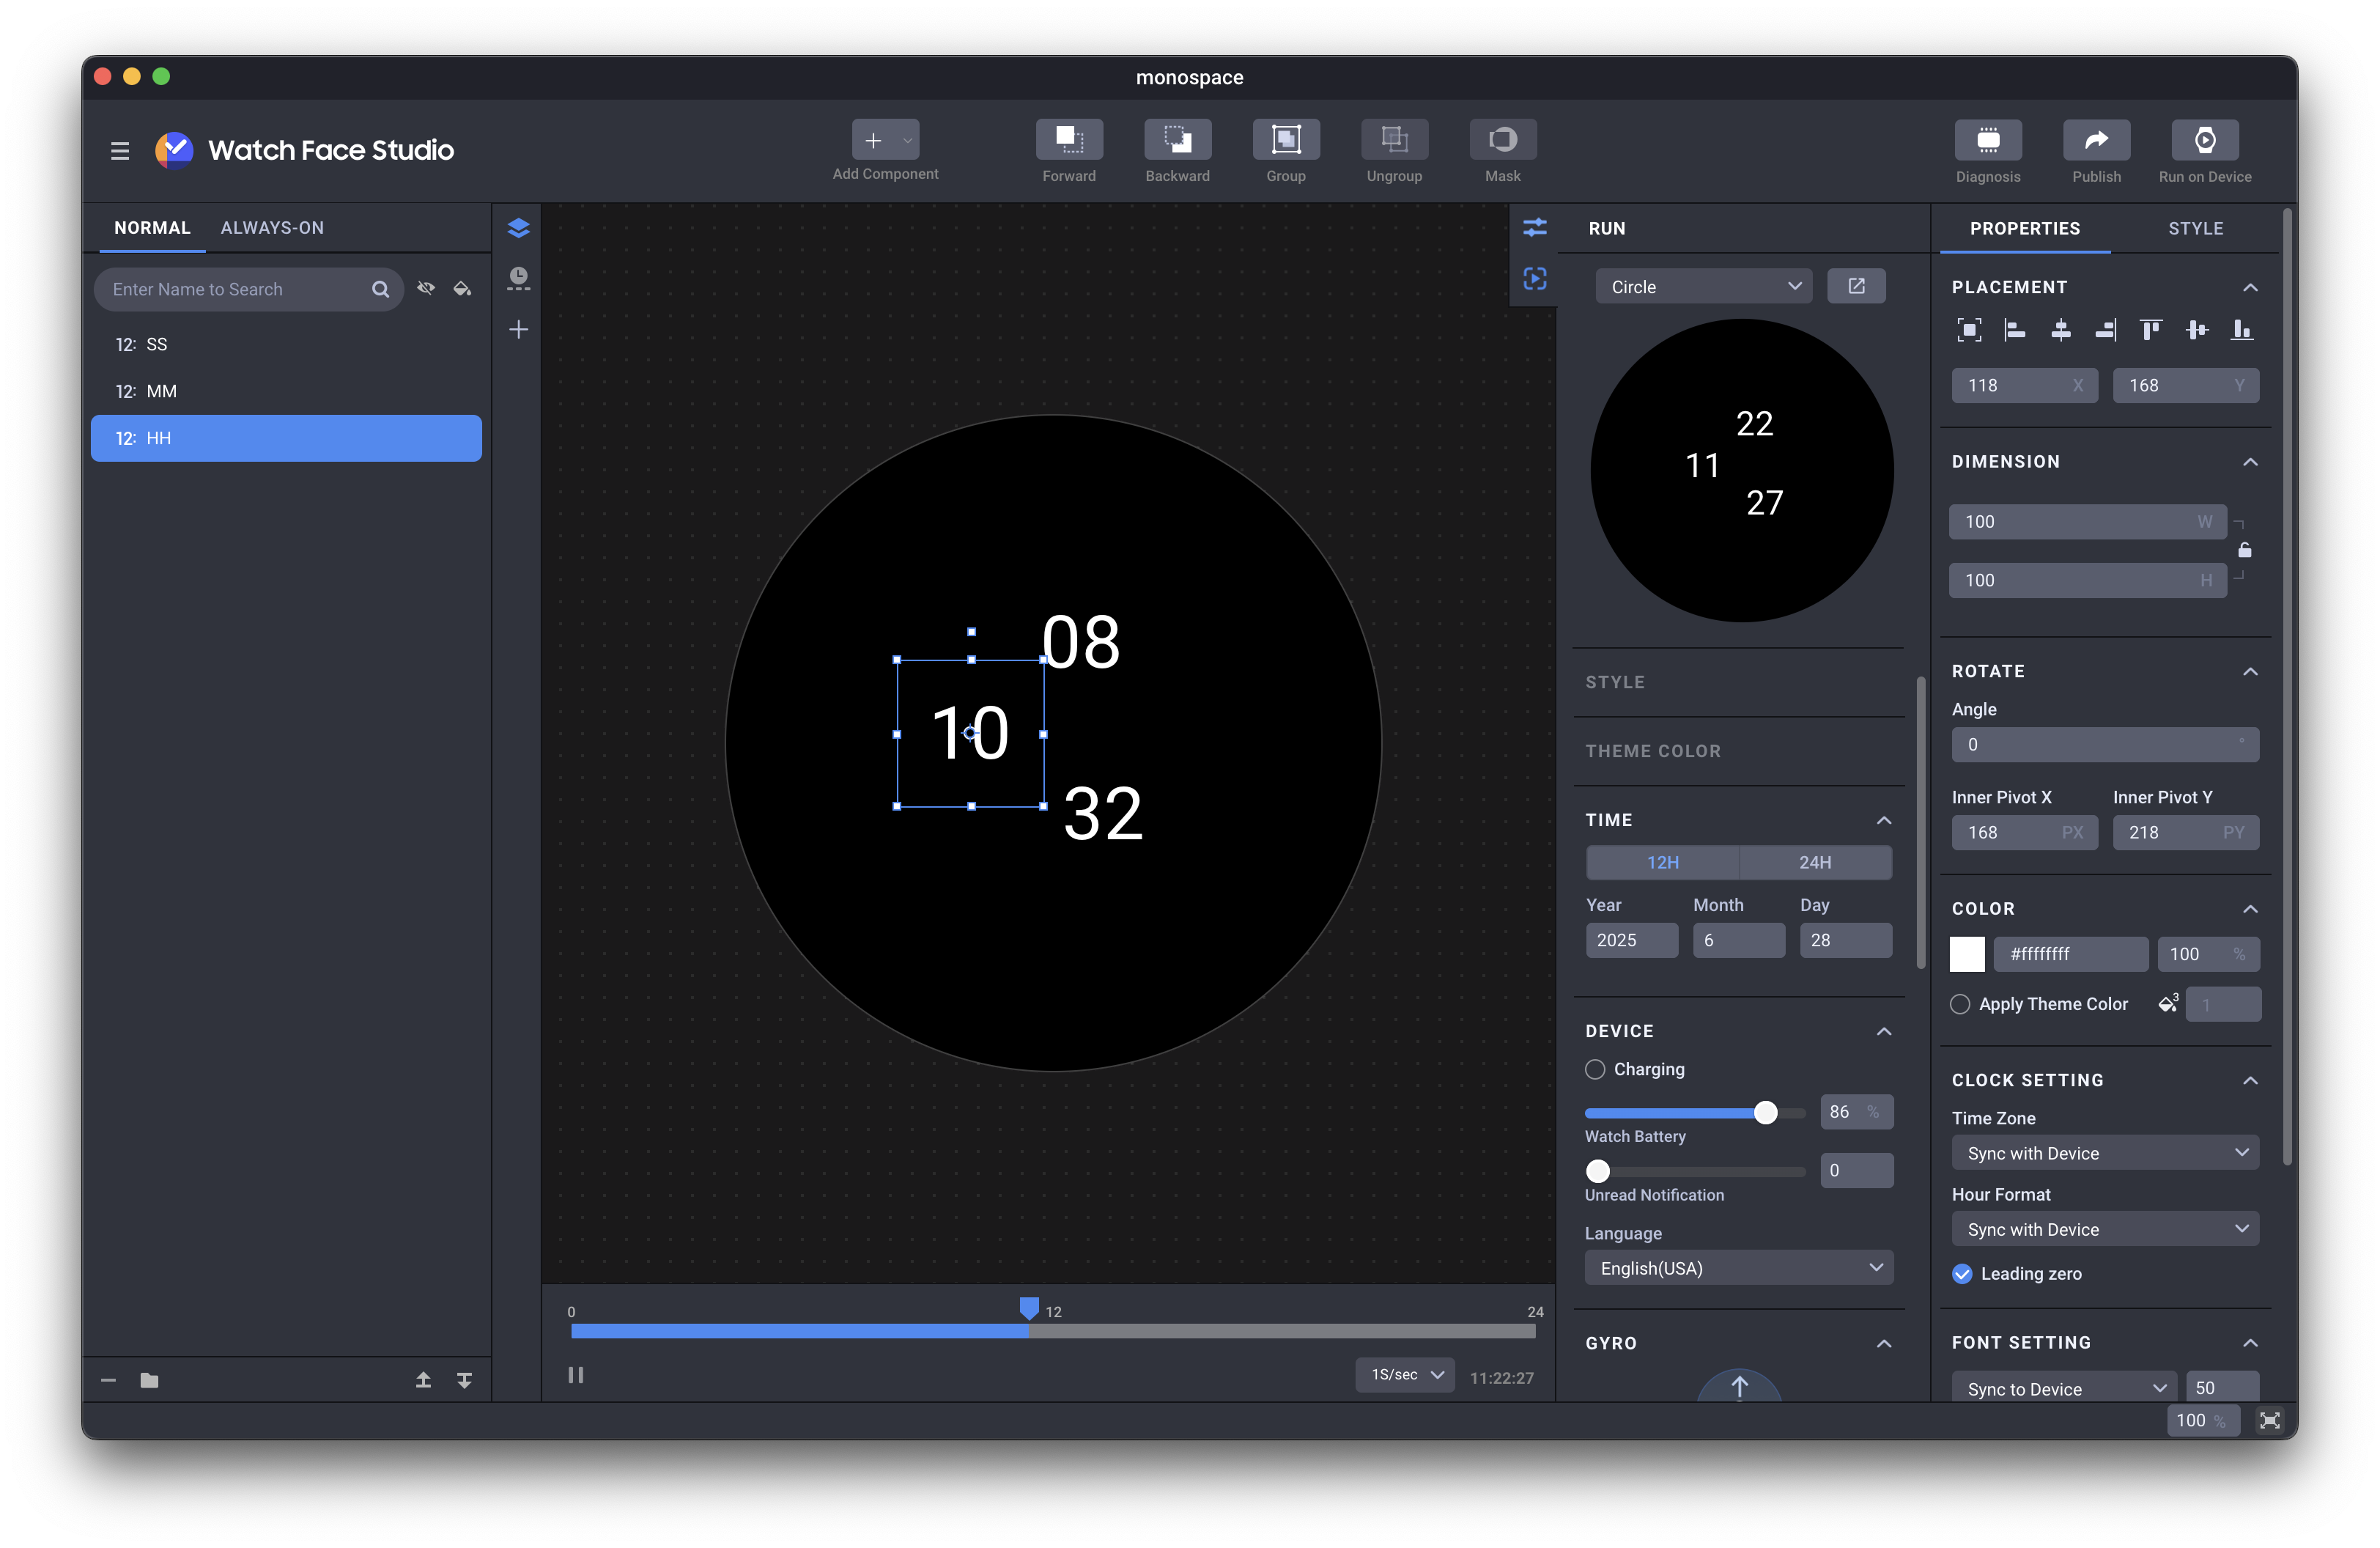
Now we need to adjust these components. We can set colors, apply fonts, and reposition these components in the studio. The output of all changes is available in the Run section at the top right of the page.
Tip
Creating groups (by selecting components and pressing ⌘ + G) and aligning components from the Placement menu can be very useful!
For now, this is how I arranged my components. (Thanks to JetBrains for its color palette and the JetBrains Mono font!)
For the rings, we can add a Progress component from the Add Component section or by using the P shortcut.
First, I'll implement the ring related to the seconds, then I'll do the same for the minutes and hours.
First, we need to add the Progress component and place it on the watch.

The ring is added, but it's not working yet because the value is 75 and the max value is 100, and that's not what we want!
We need to configure what value the ring should represent.
This can be done from the Properties Tab → Range Setting → Value. If you focus on this input, a button will appear named "Tags."
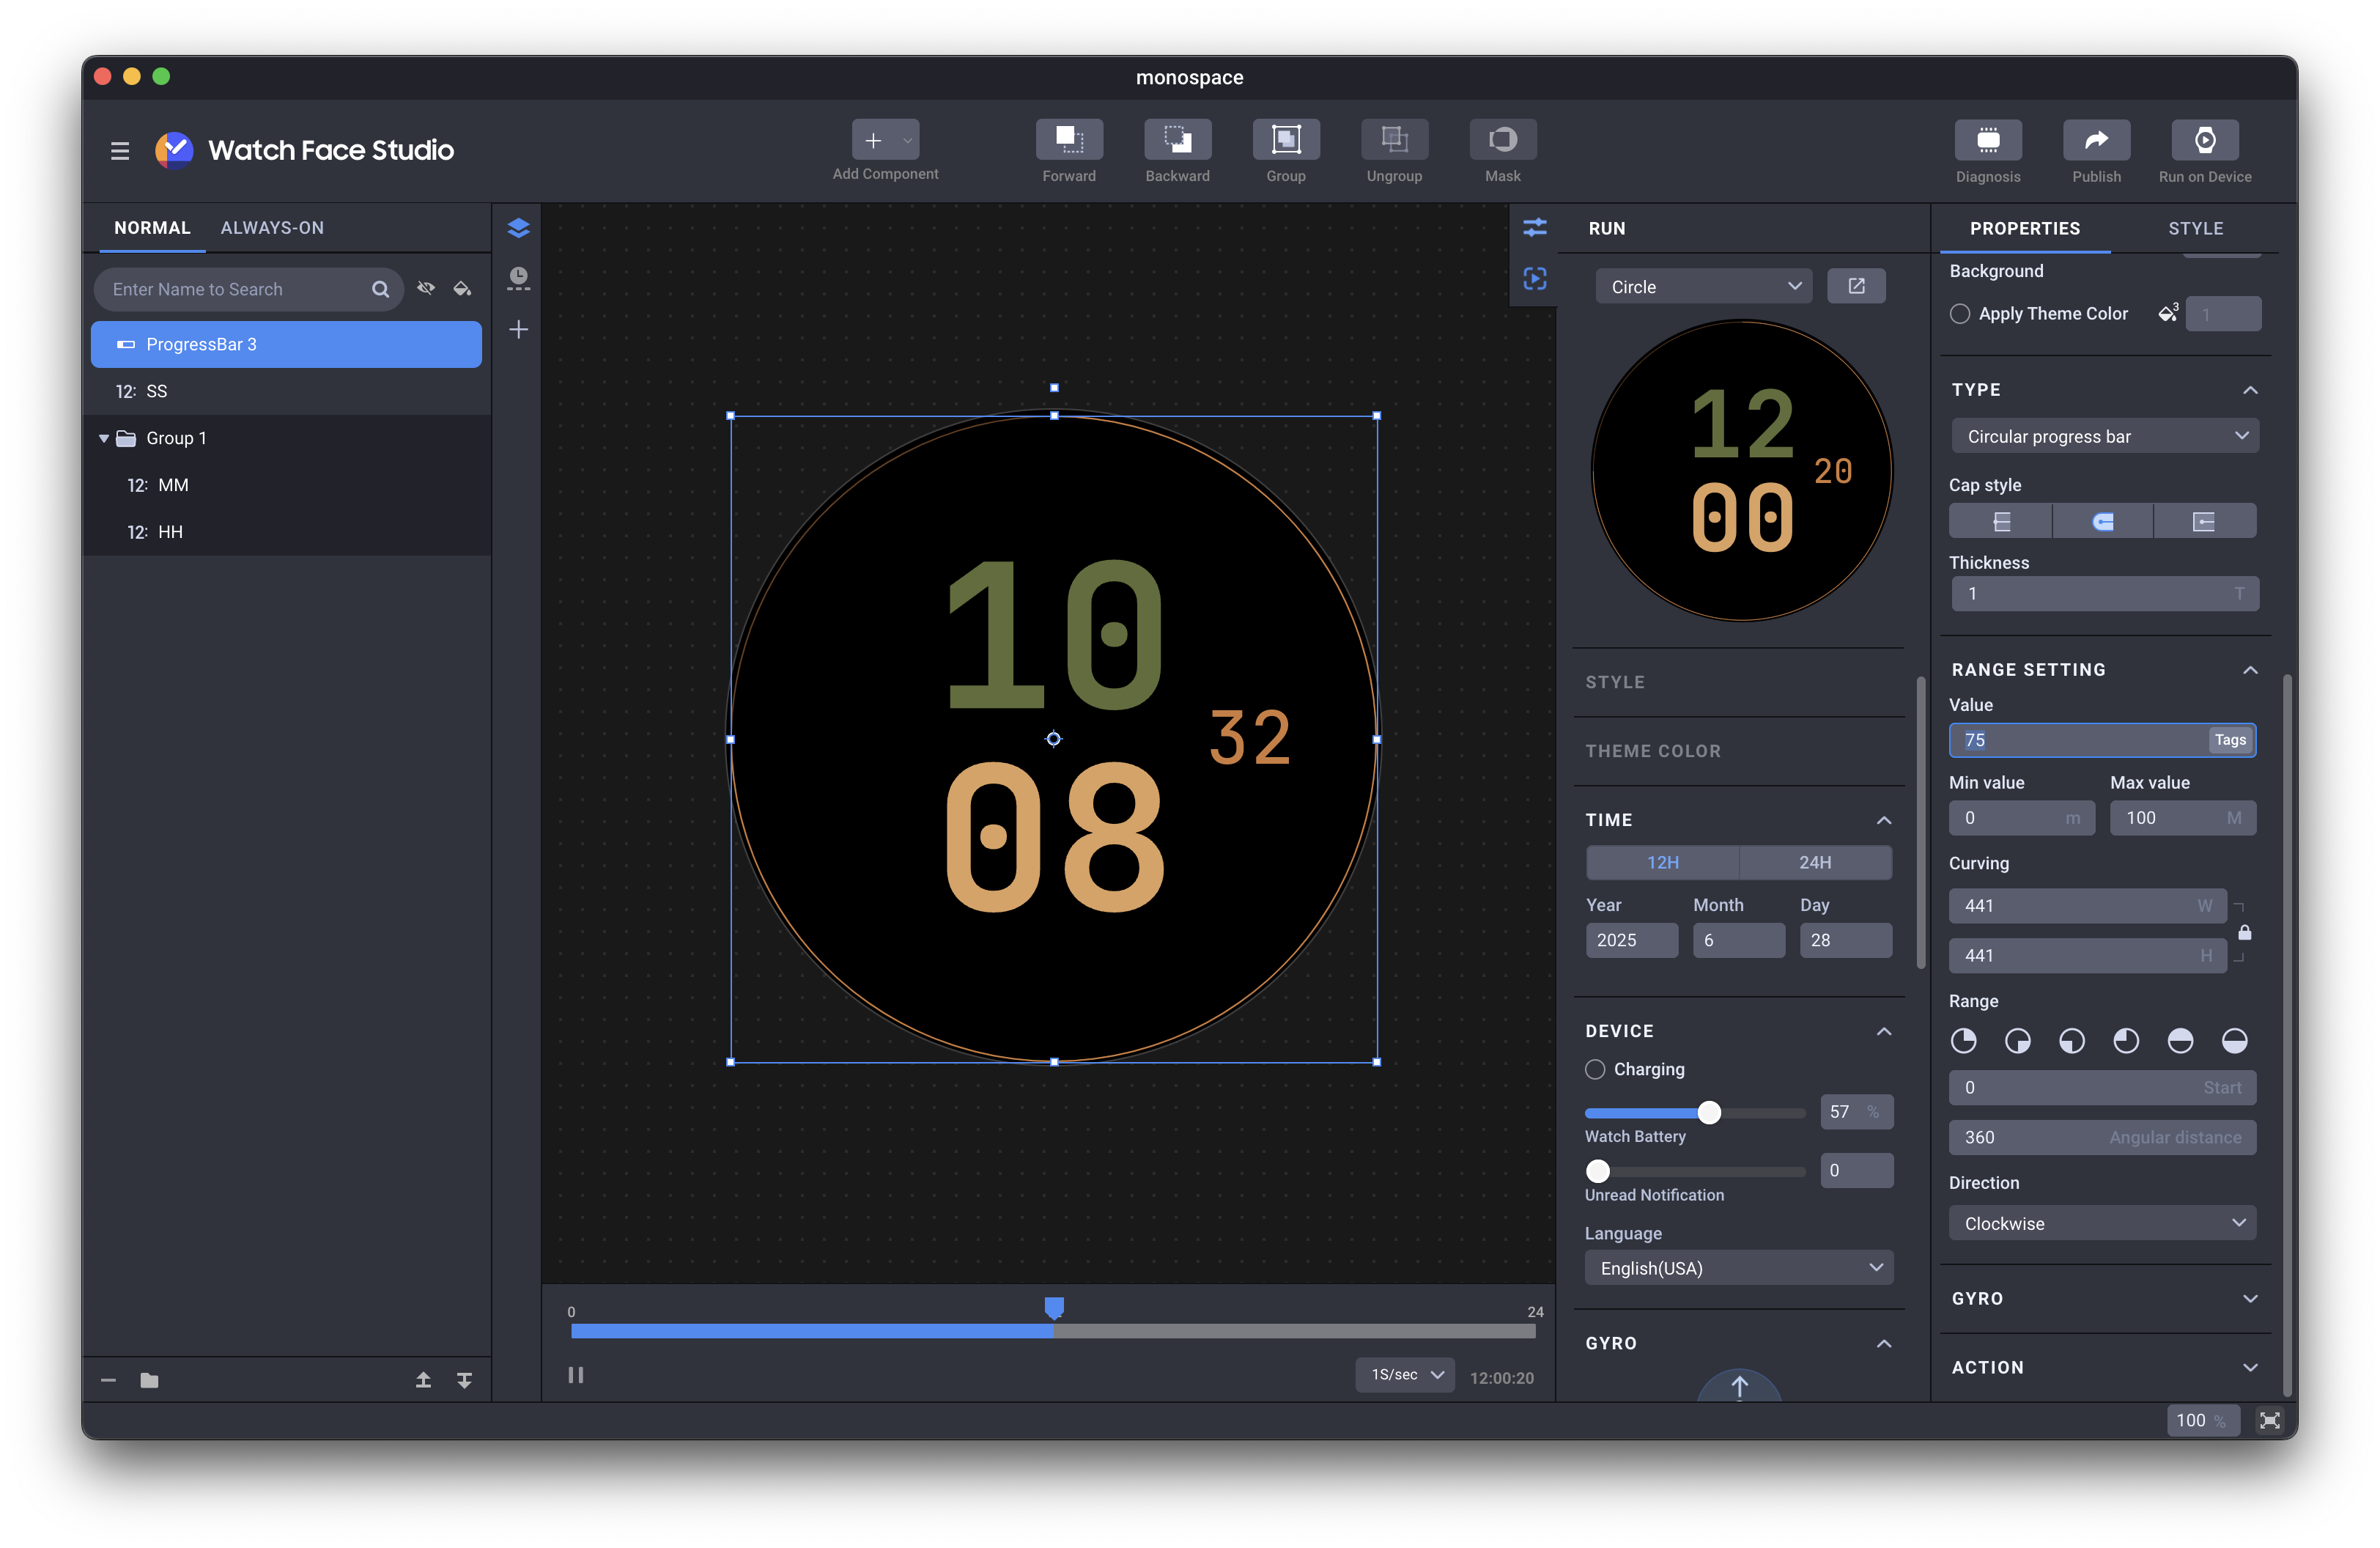
First, we need to set the value to 0, then click on the Tags button.
This will open a popup, and you can choose what value you want to give to the ring!
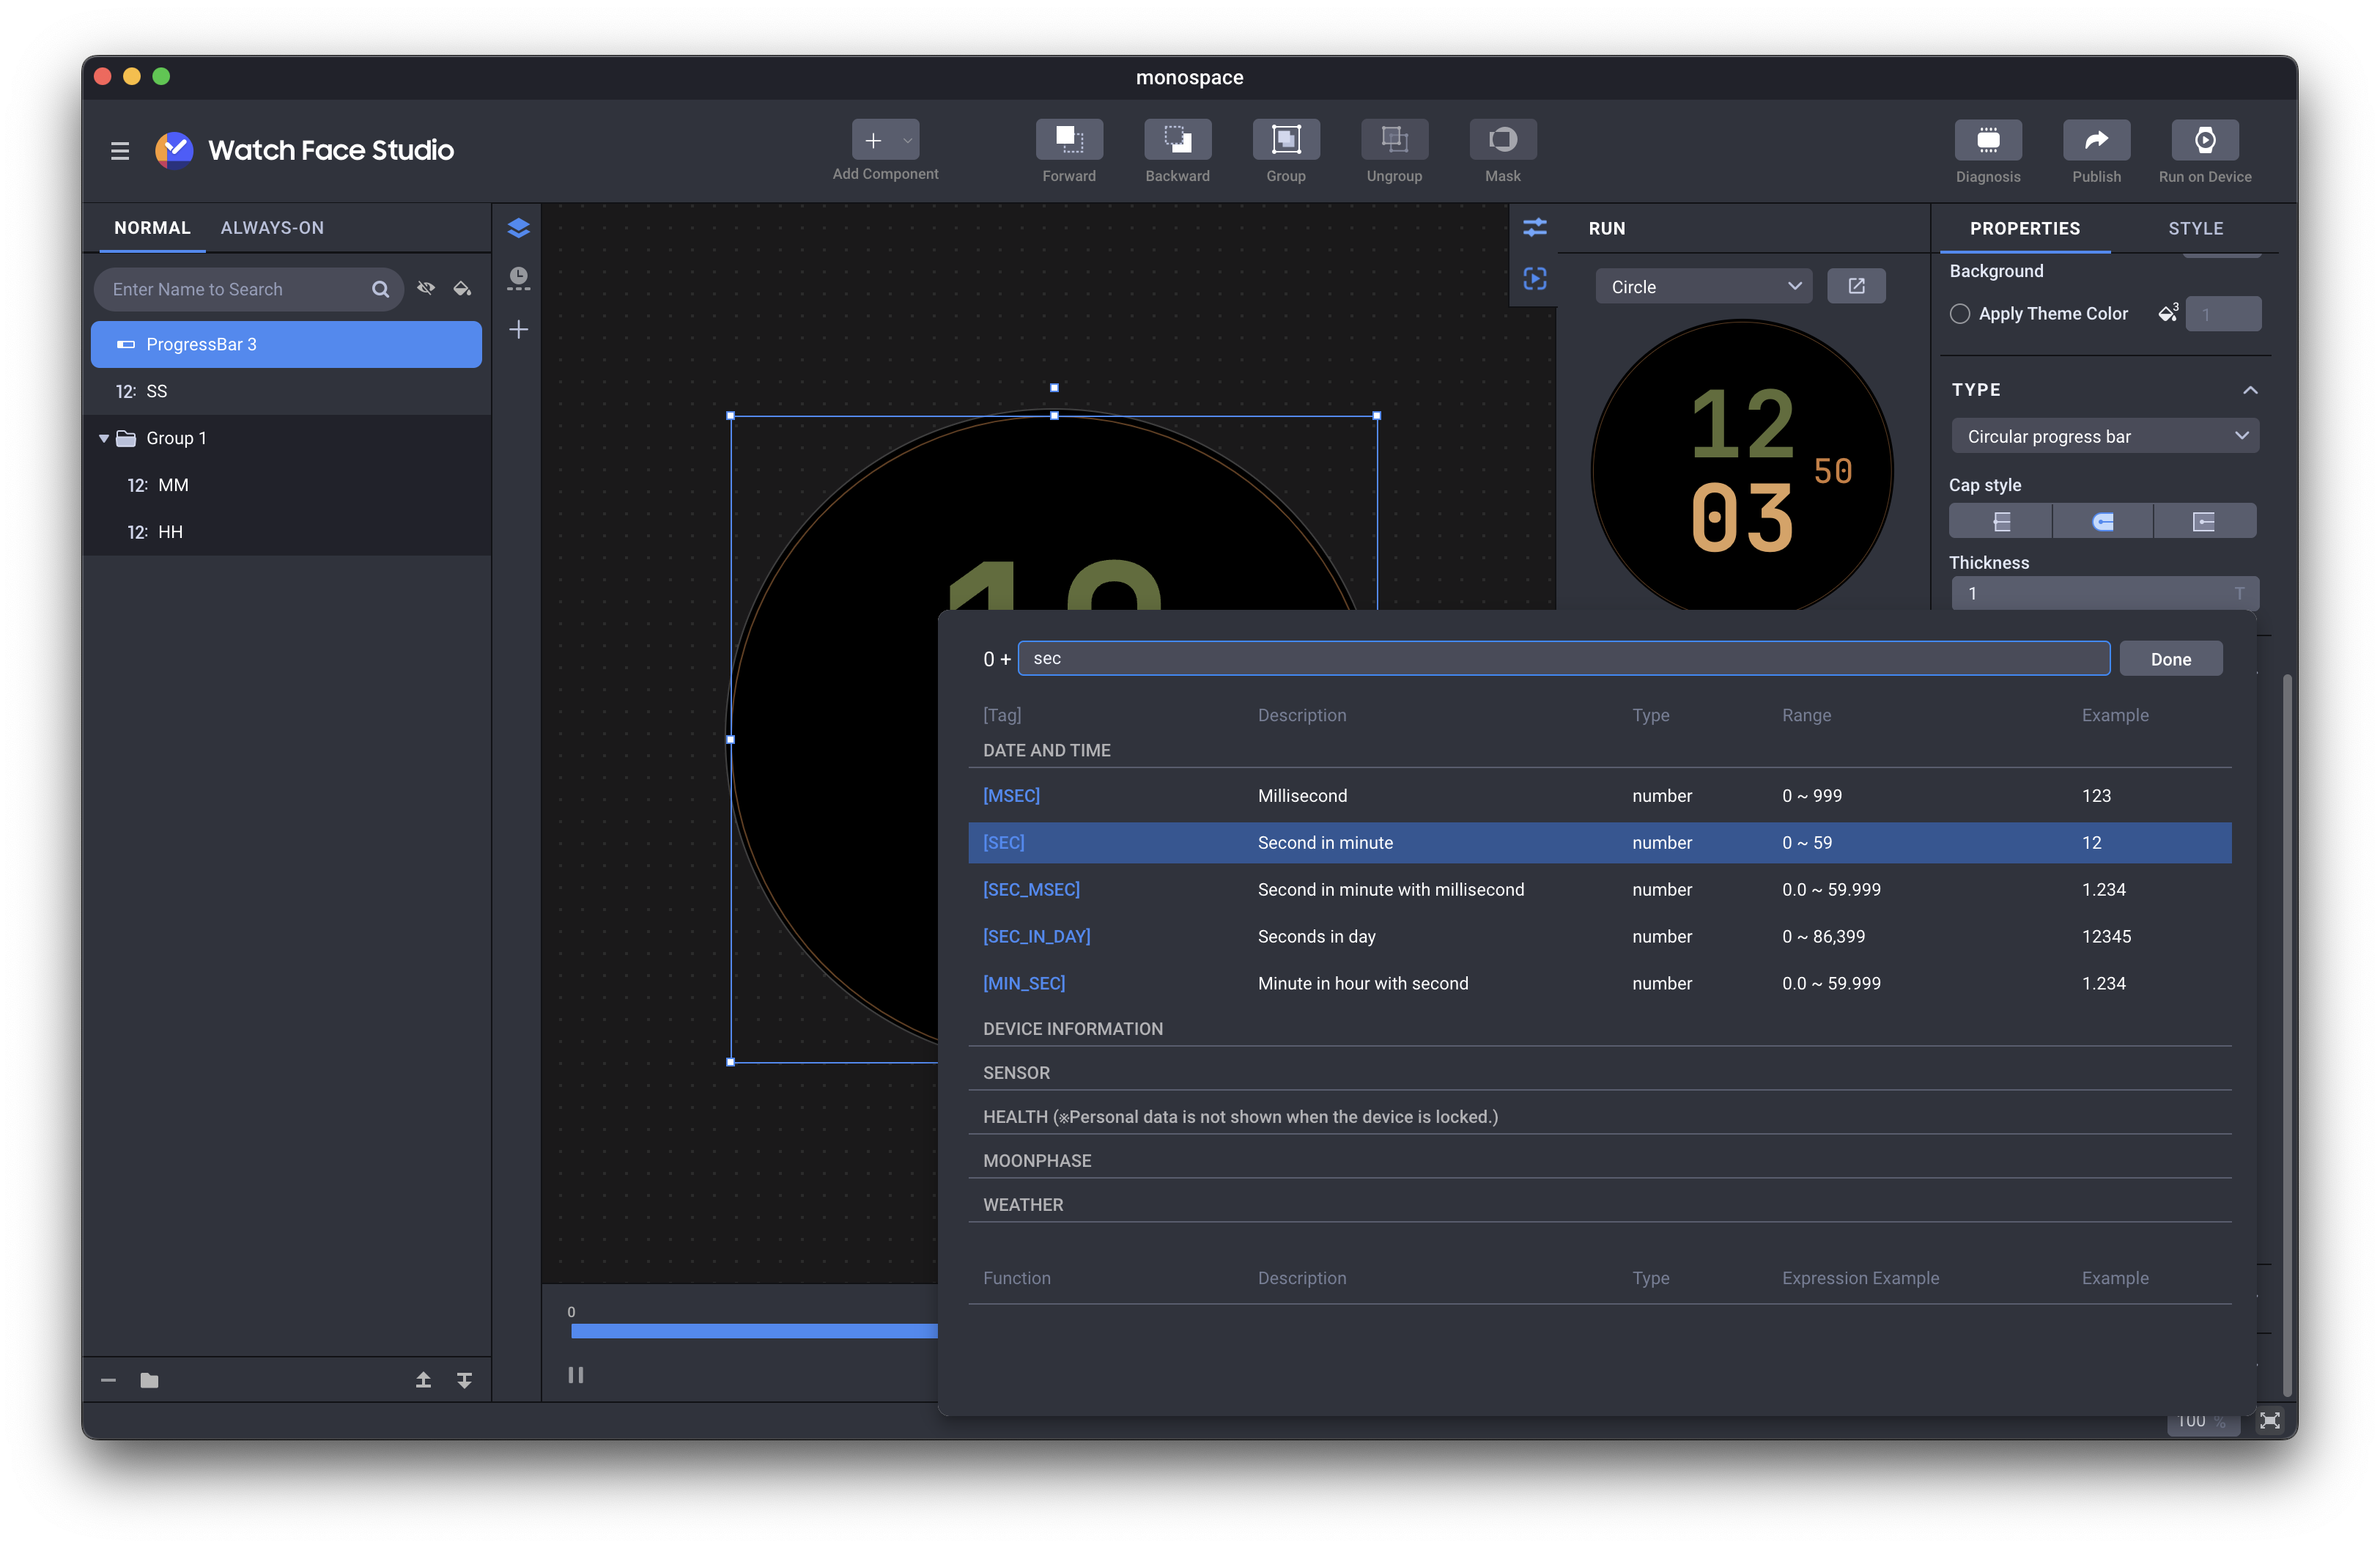
After searching for sec, we will see a row like this:
| [Tag] | Description | Type | Range | Example |
|---|---|---|---|---|
| [SEC] | Seconds in minute | number | 0~59 | 12 |
We need to select this. But note that the range is between 0 to 59, but our max value is 100. So we need to set the max value to 60, the number of seconds in a minute.
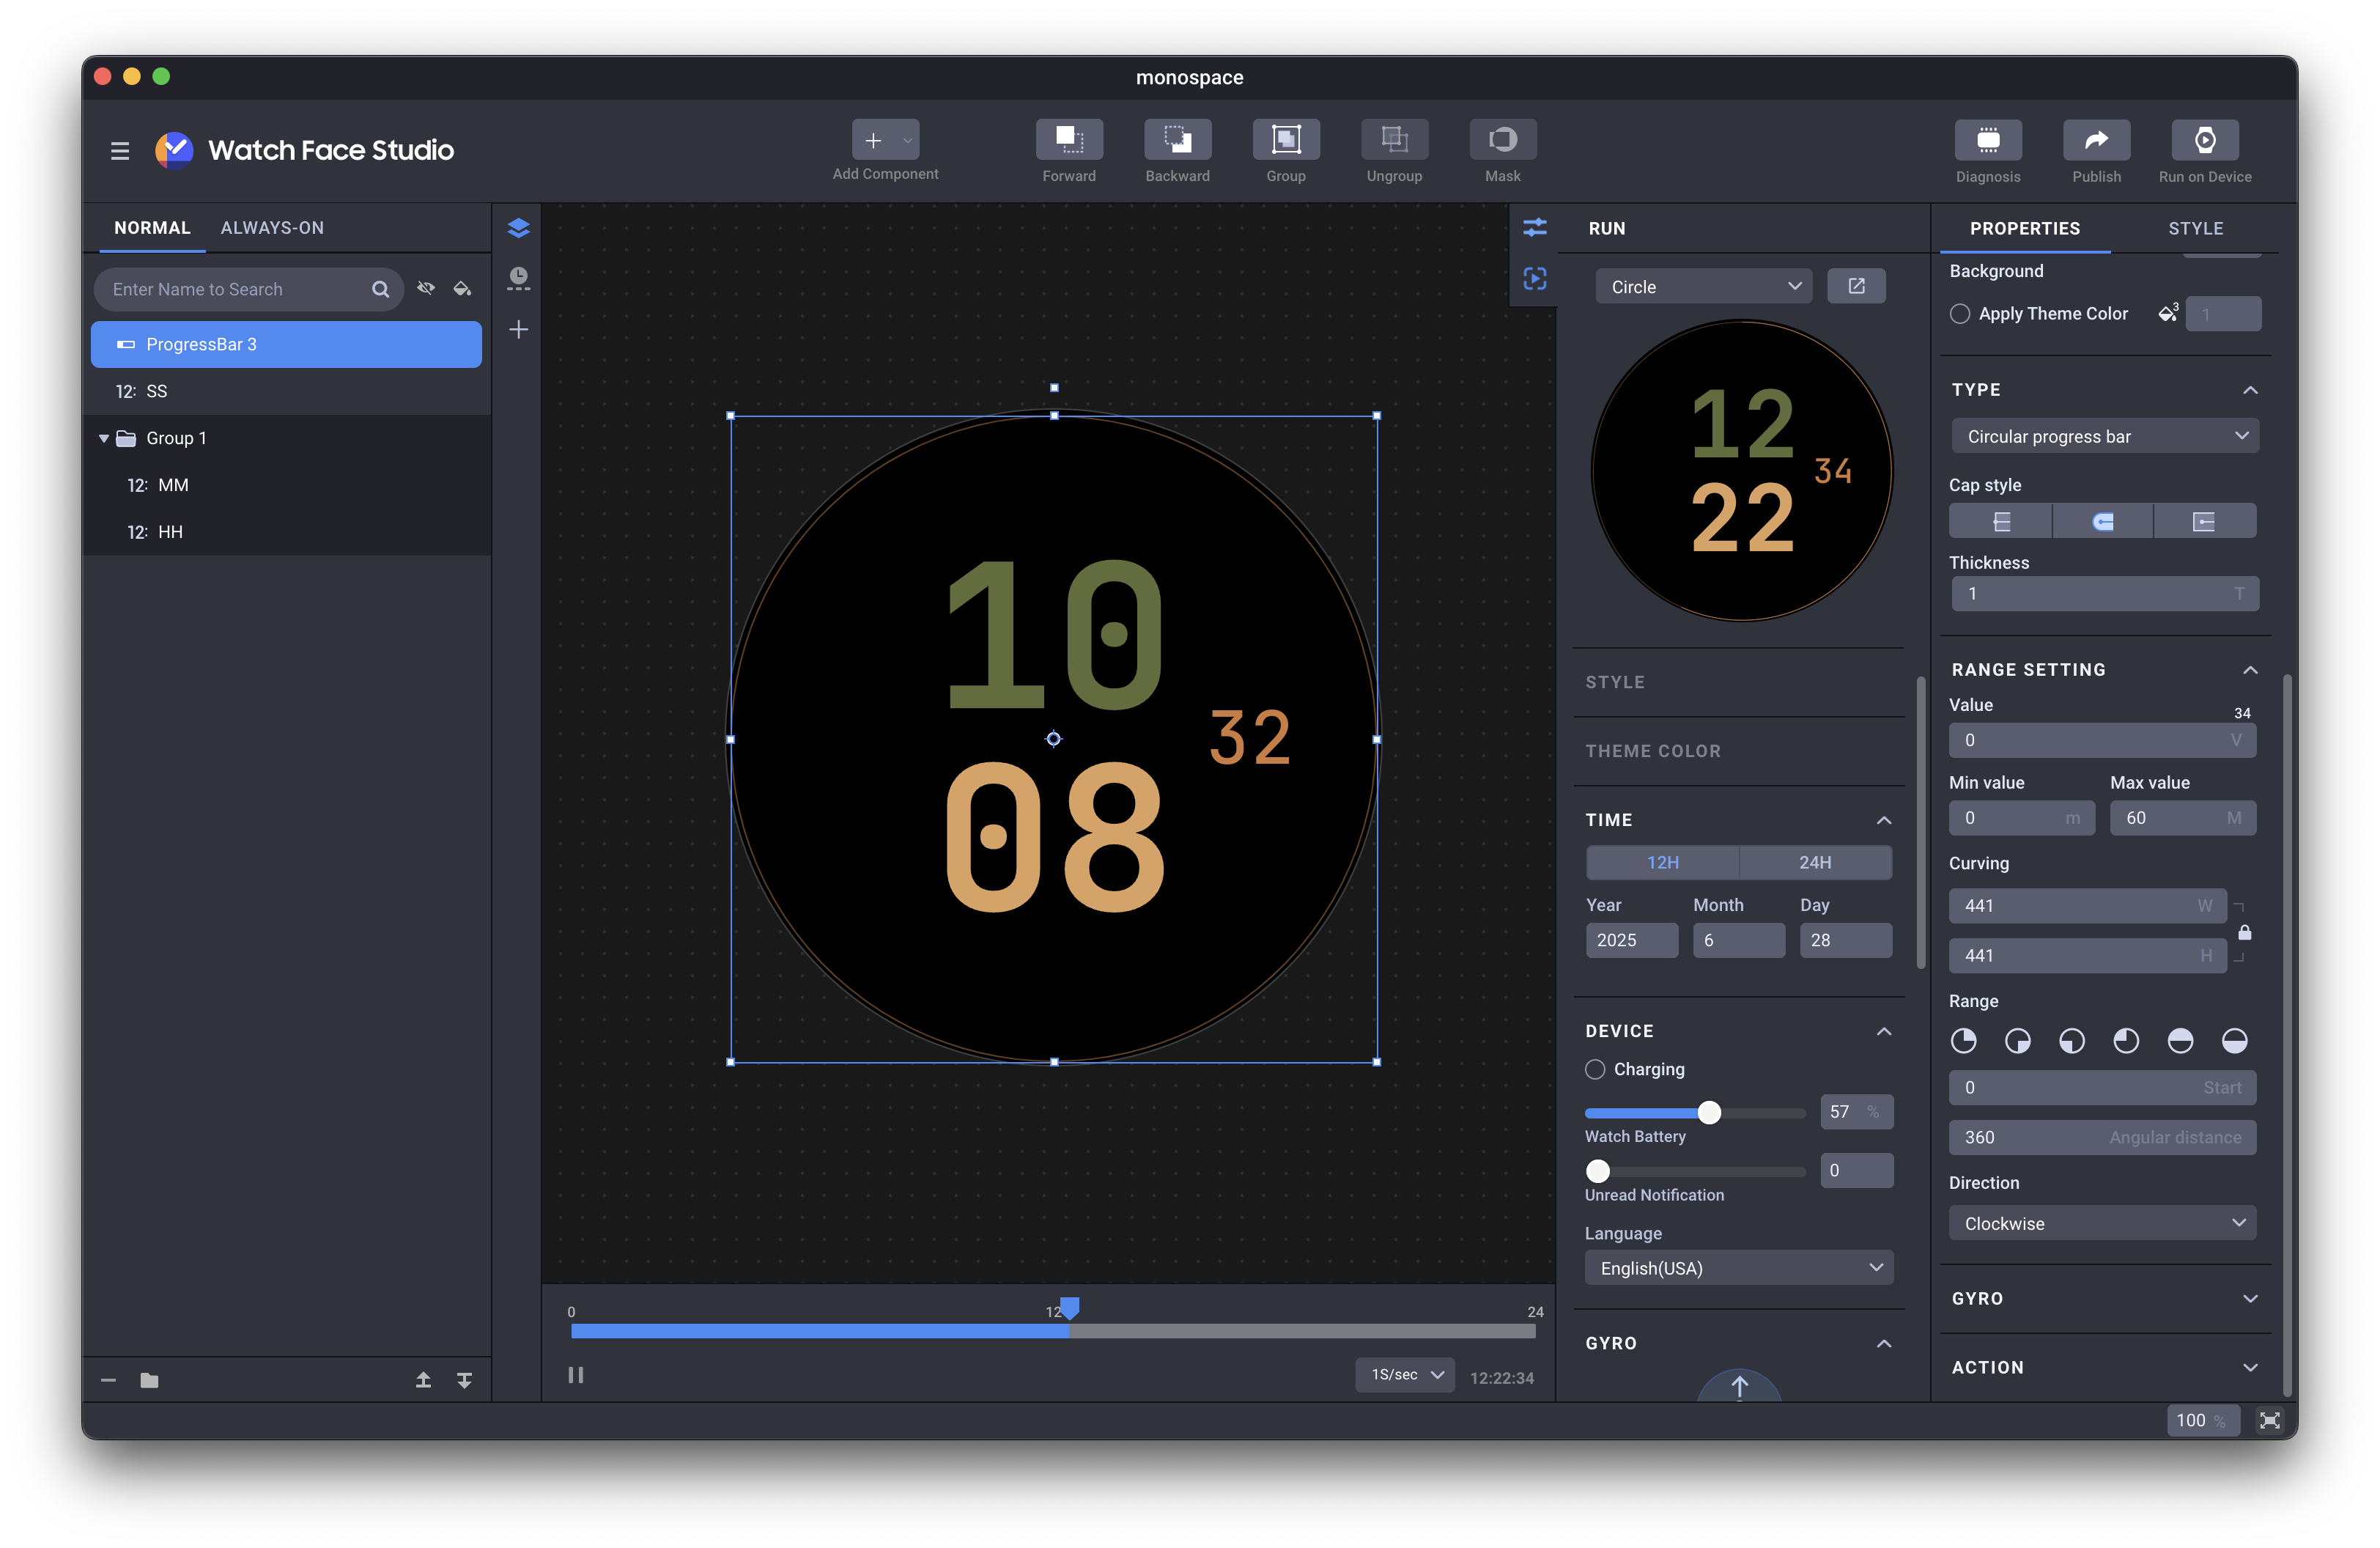
After doing the same thing for the other two rings, our implementation is done!
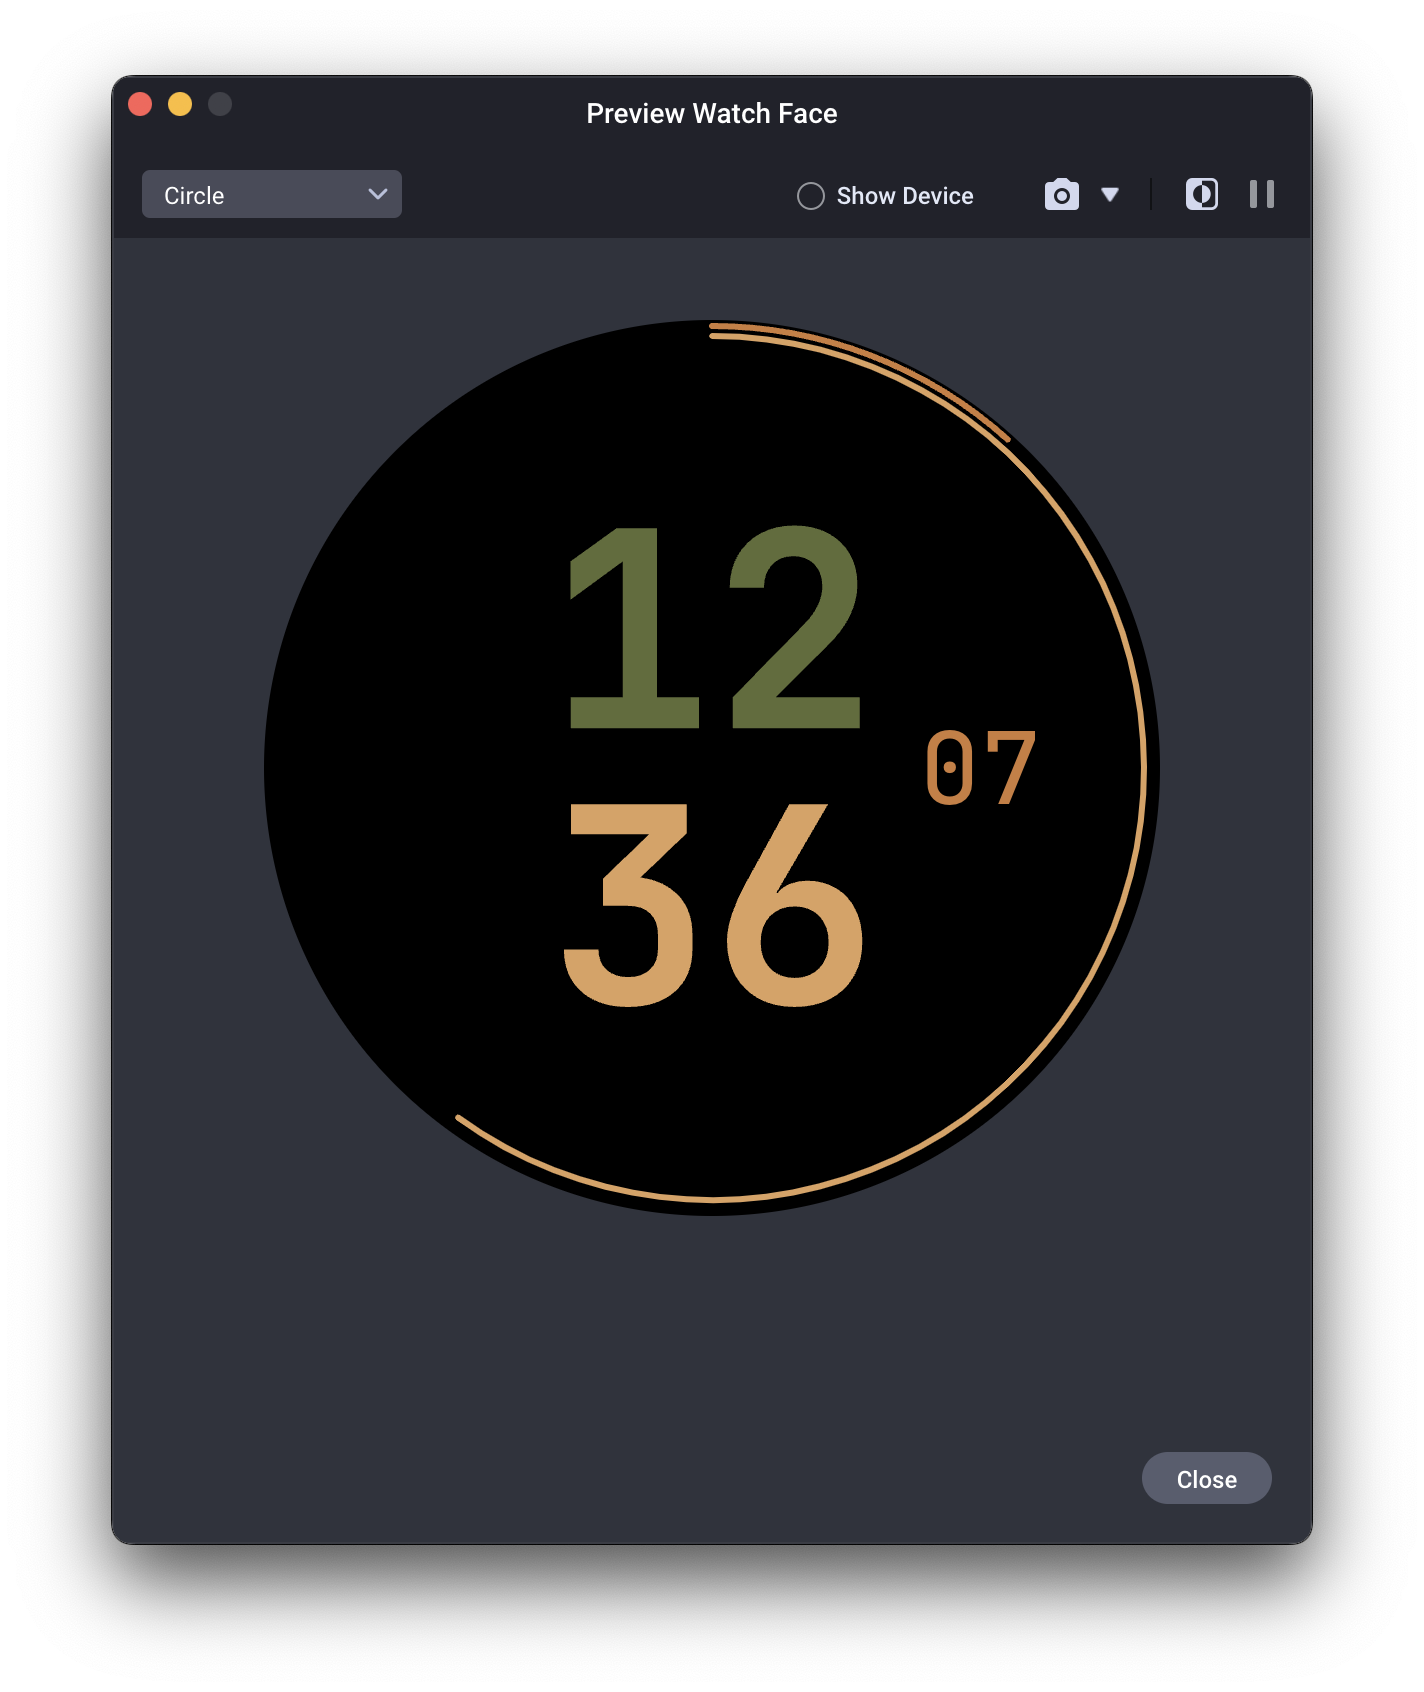
Okay, we designed the watch face in WFS. Now what?
It's time to move it to our watch and test it! The watch face can also be published on Google Play, but for now, we are going to install it manually on the physical watch.
To connect the watch and computer for debugging:
- Enable debugging on the watch.
- Ensure that the watch is connected to the same Wi-Fi network as your computer.
- In WFS, select Project > Run on Device.
- In the case of a Wear device running Android 11 (API level 30), select the + button and enter your watch’s IP address.
- In the case of a Wear device running Android 13 (API level 33) or higher, select the + button and enter your watch’s IP address, IP port, pairing code, and pairing port of the paired device.
- Select OK.
WFS will scan for and attempt to connect to the device.
Using these instructions, the watch face will be shown on the Galaxy watch!
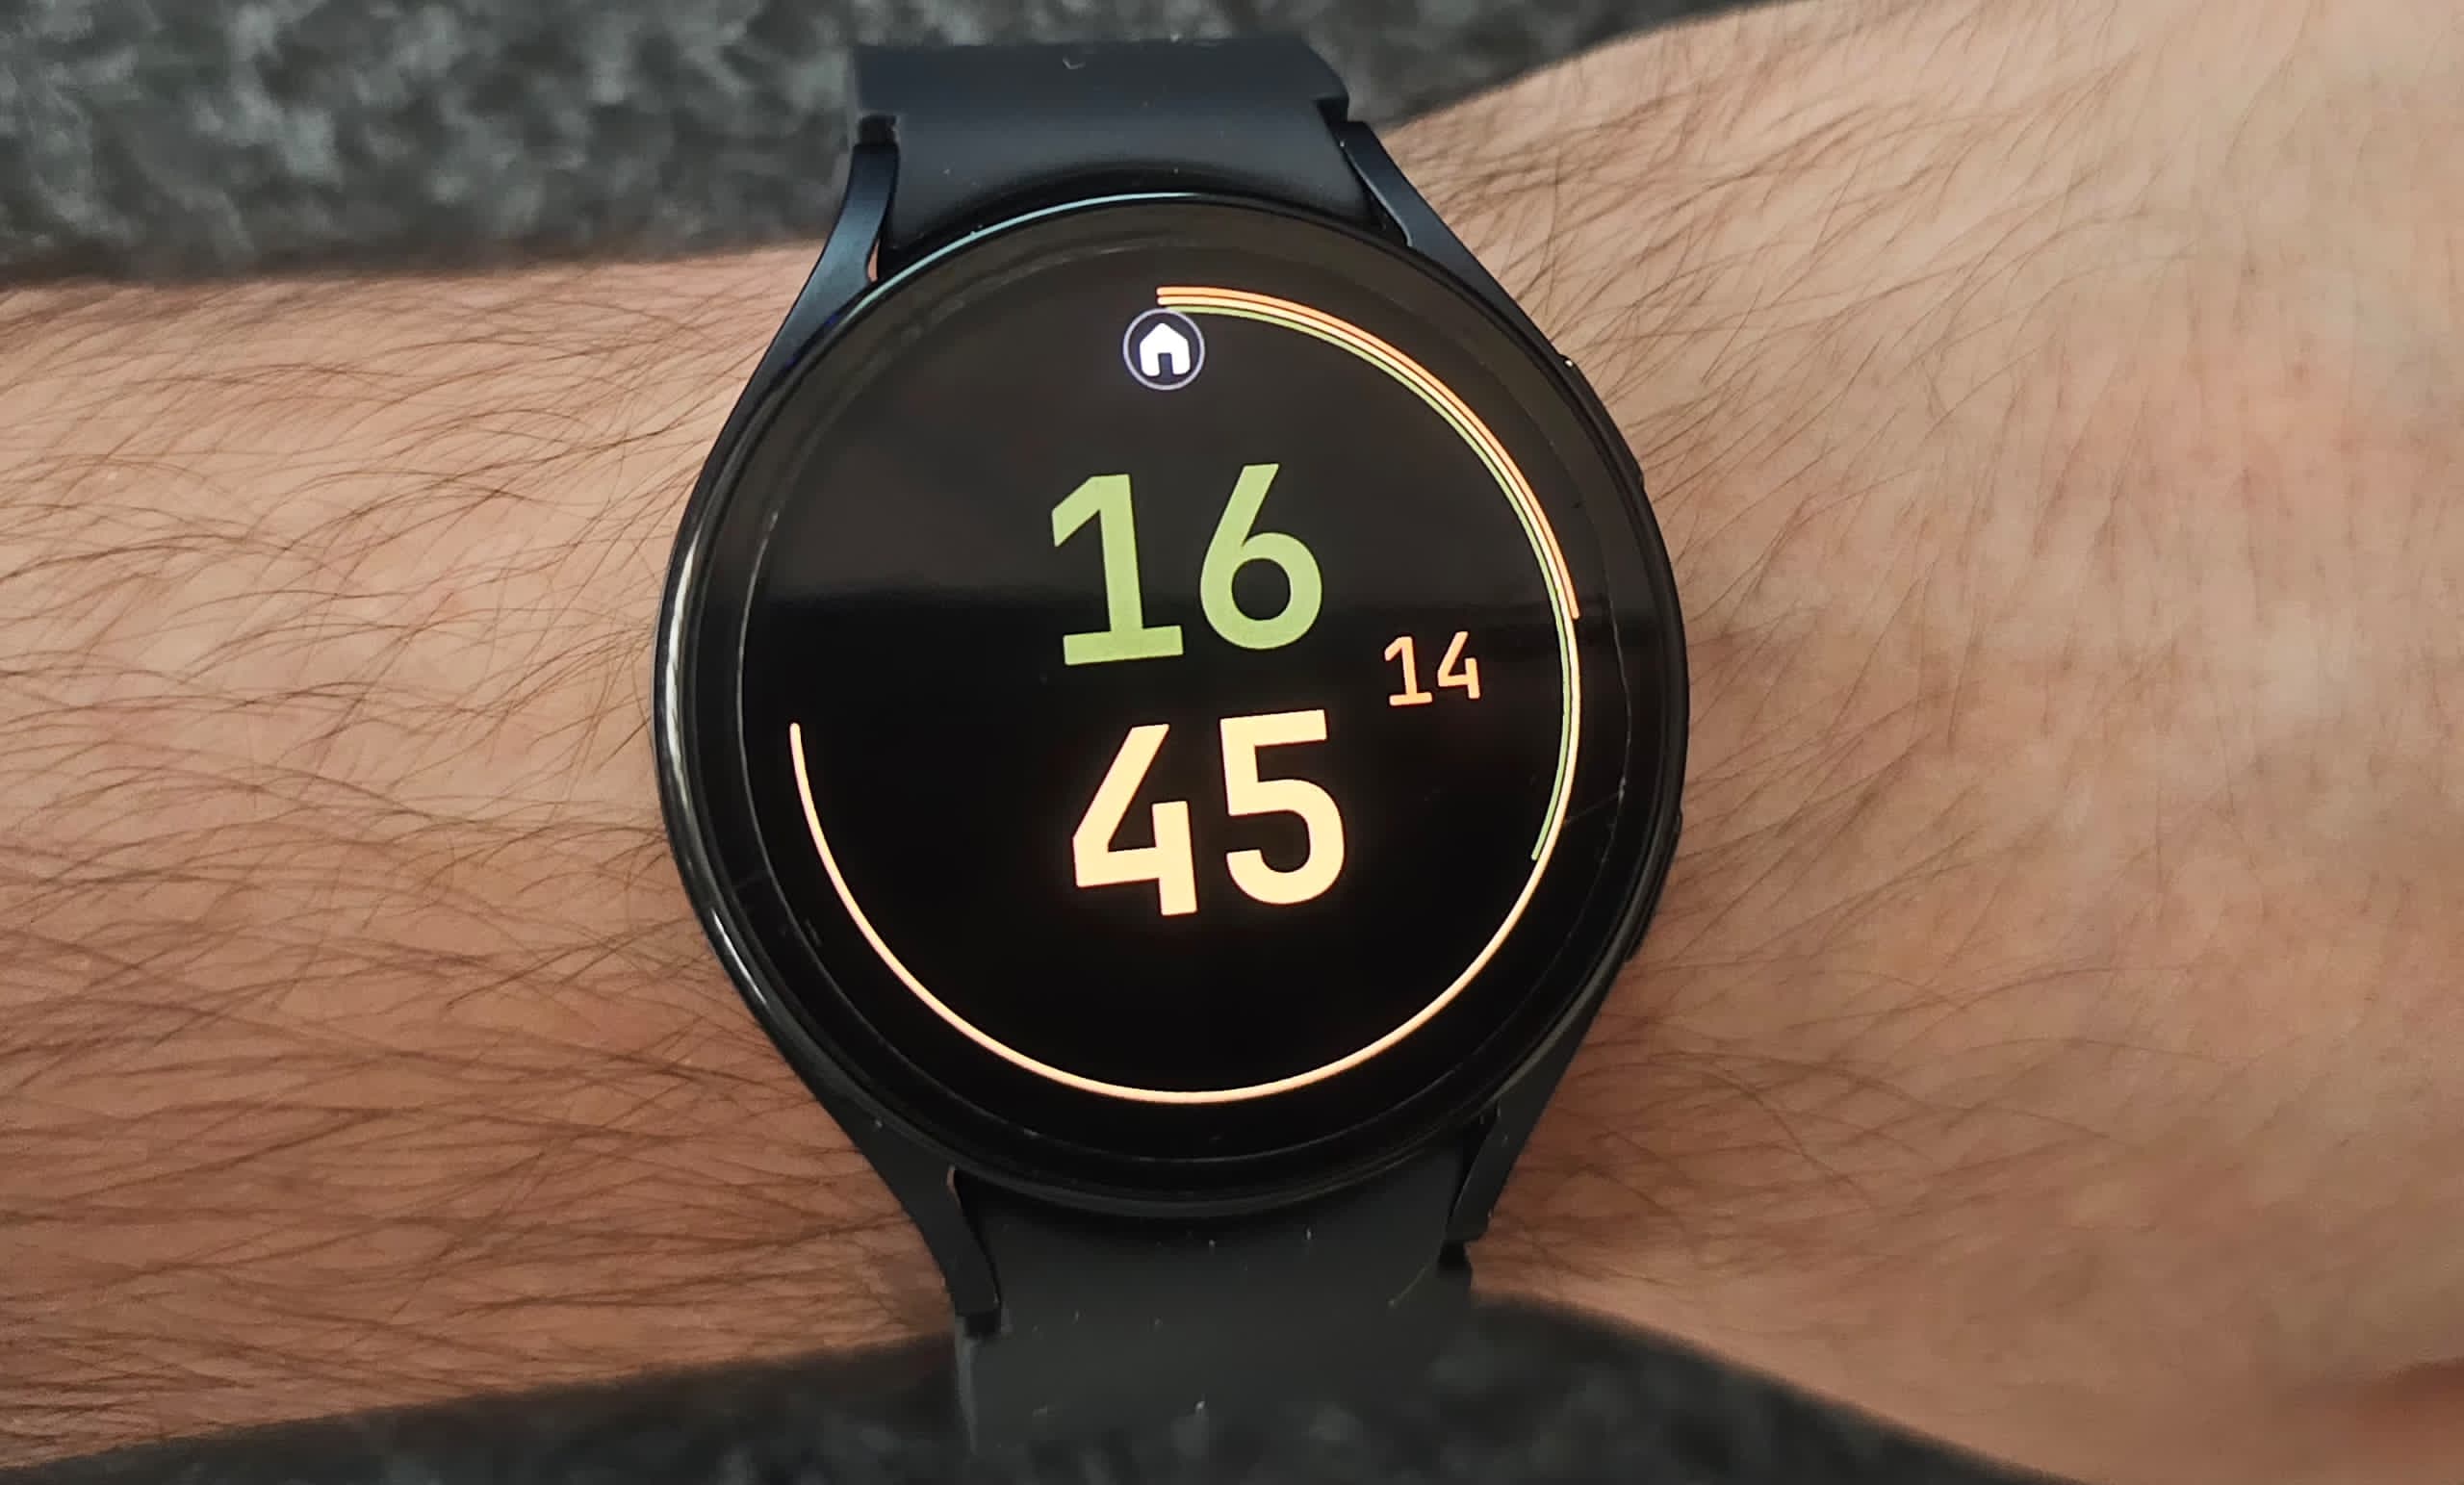
And there you have it! We started with a simple idea and, using the powerful and intuitive WFS, brought a personal, custom-designed watch face to life. As you can see, you don't need to be an expert developer to start creating something that truly matches your style.
This was just a minimal design, but the possibilities are endless. You could add complications like a step counter, battery life indicator, or even weather information. I encourage you to dive into WFS, play around with the components, and see what you can create.